Gym Leader Jasmine
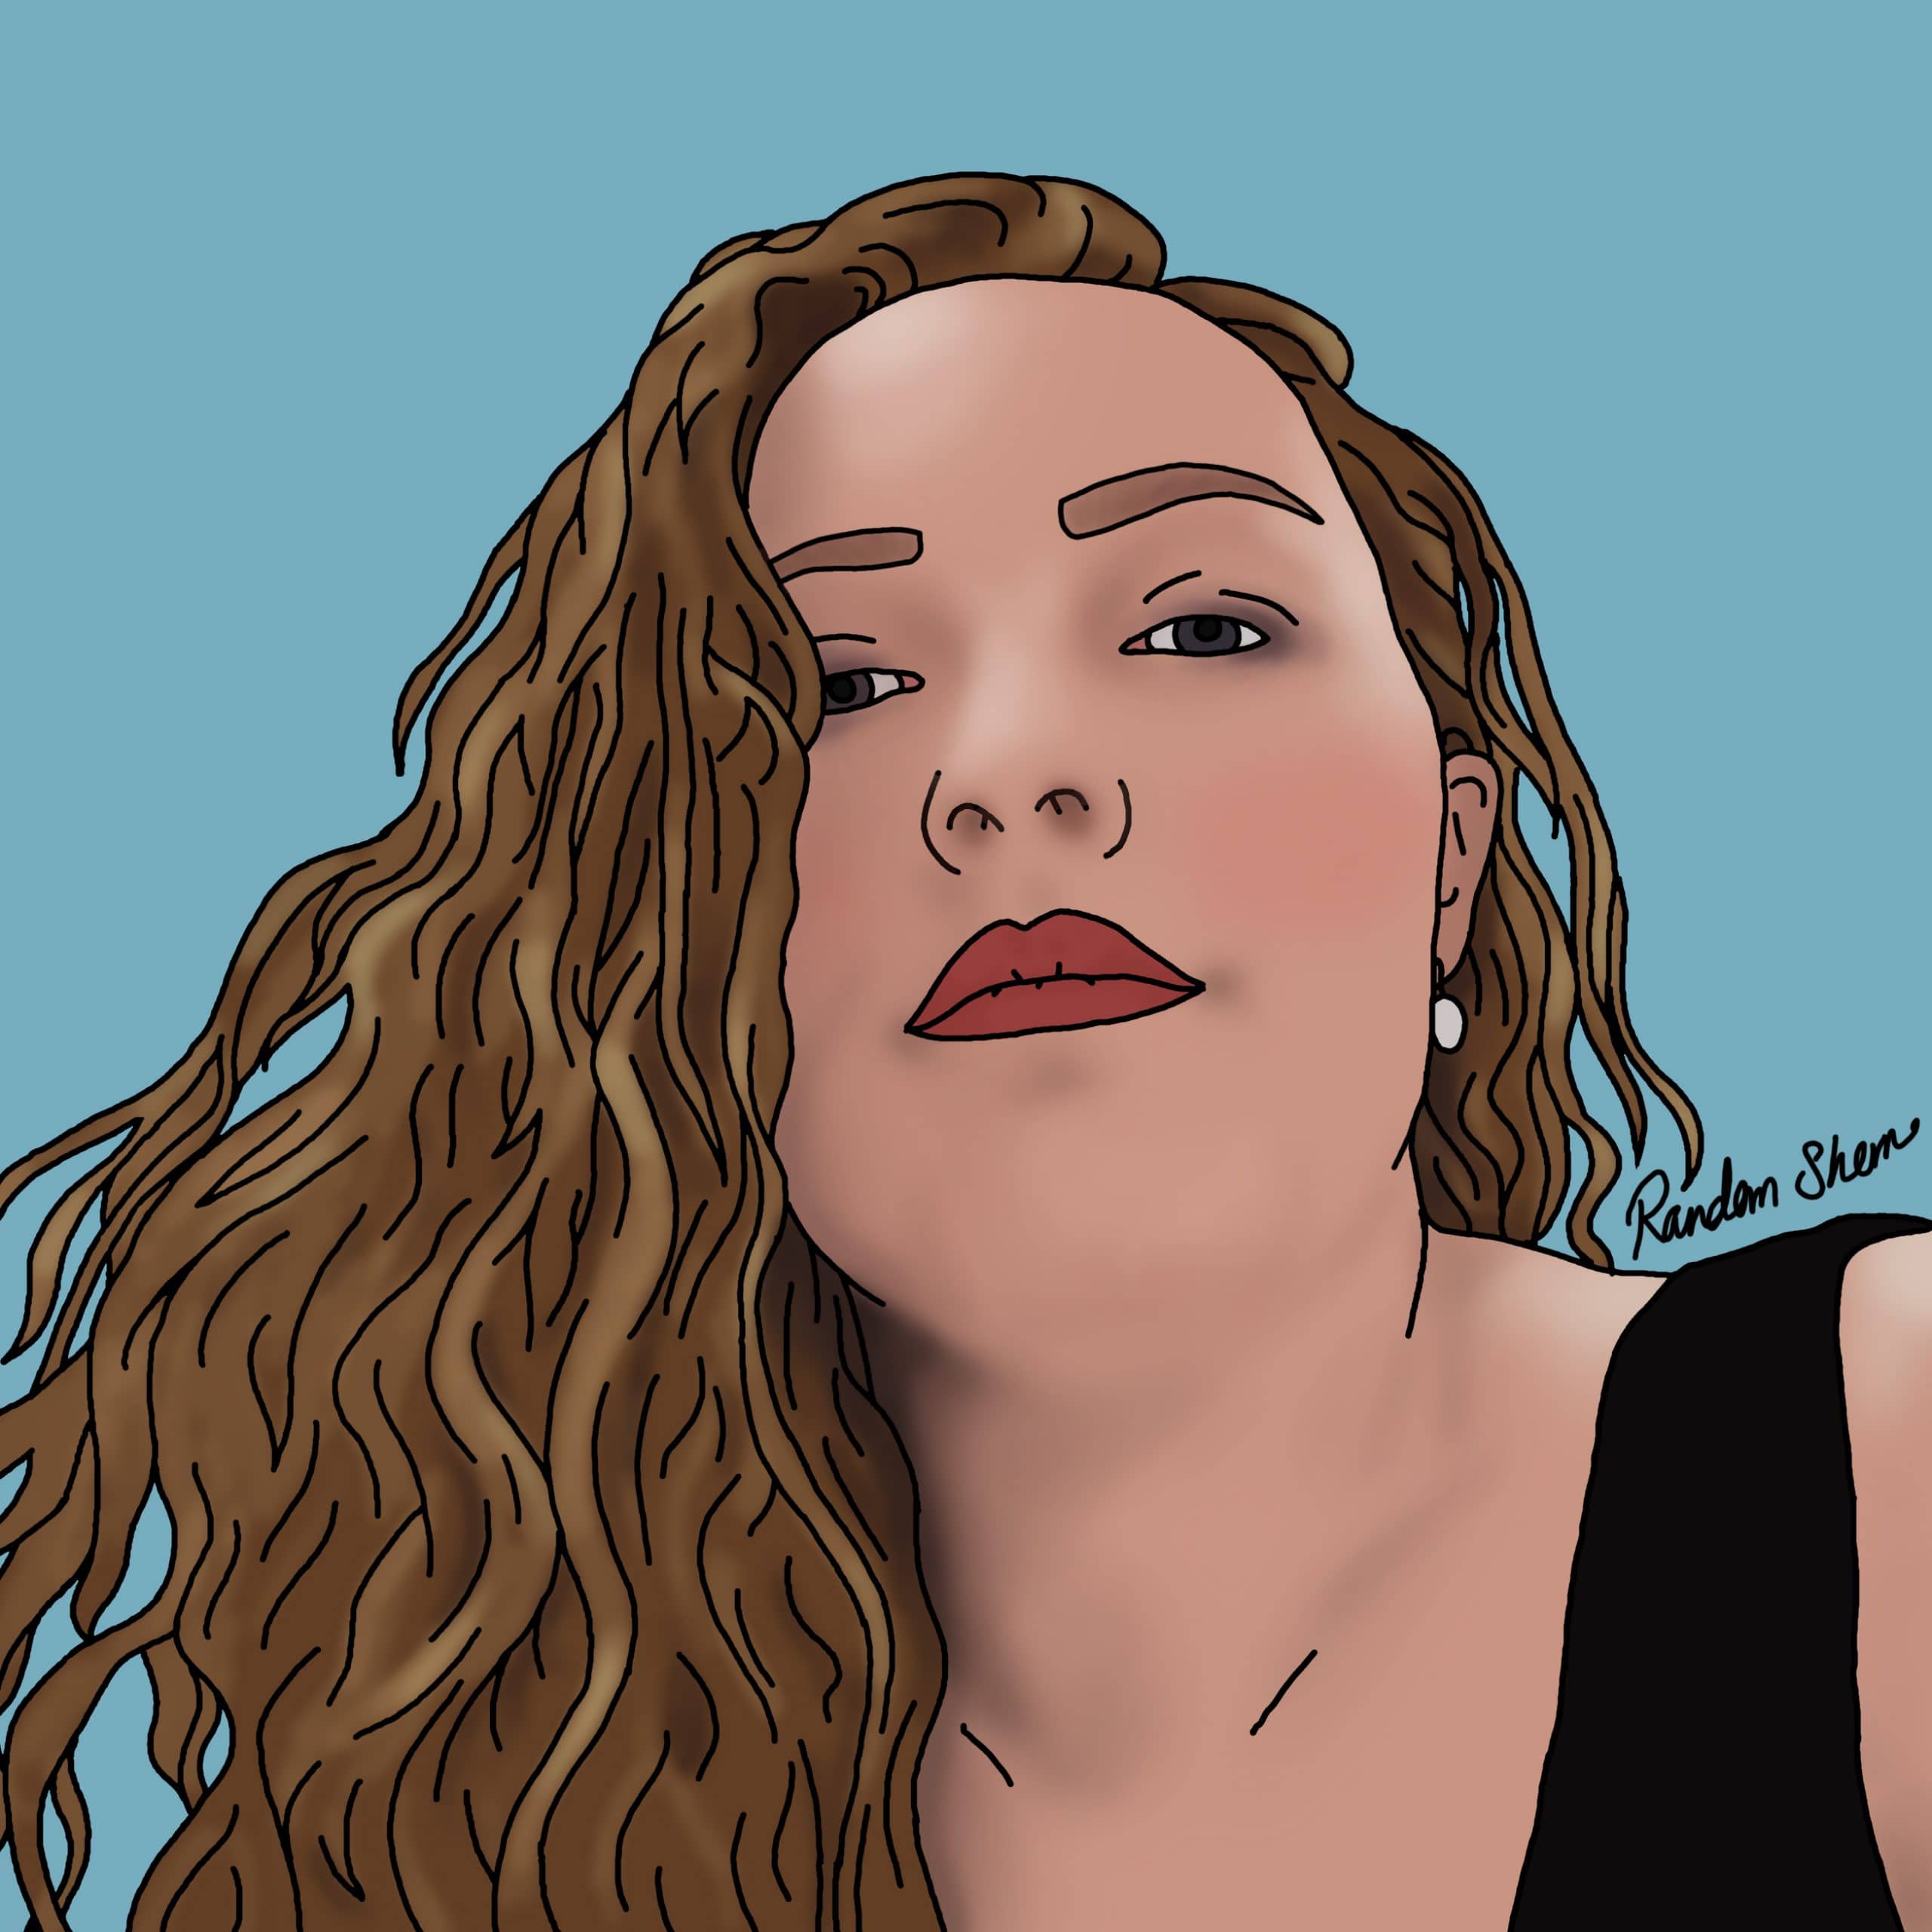
 Next up is Gym Leader Jasmine. Sometimes it’s friends that help inspire a cosplay, this one came from the suggestion of creating a group of Pokemon Gym Leaders. We found an image showing all of the sprites for the various different gym leaders with their primary Pokemon and I was drawn to Jasmine (not going to lie… it was partially due to the hair length and colour being similar to mine, but can you blame me really?)
So to create the look I needed to create/find a dress, cardigan, bow, shoes and sort out the styled hair. Compared to some of my cosplays, she is made up of fewer layers and details, but she works equally as well and with Magnemite at her side has proved to be really recognizable. Magnemite will be covered in another post so keep an eye out for him if you are interested to know how I figured out his template.

So let’s begin with the dress, it was the first time I had made a dress from scratch so I felt it was best to use a dress I already owned as a template as I knew it fitted, was a nice shape and I could see how it was assembled, which allowed me to reverse engineer it. I went out and purchased the blue fabric, matching blue zip and the white organza. On reflection I probably should have chosen a stretchy fabric to make it more comfortable… but I didn’t, it’s worth also noting that sewing stretch fabric is a bit of a pain so worth avoiding on early projects until you get a little more confident and have some time to practice.
This dress is made in three parts; the upper section, the waist, and the skirt section. As I said these were closely matched to the existing dress panels, the only difference I made was pulling the waist in slightly more. This isn’t a feature on the character’s dress but its a style that suits my body shape better. Please take note: This is certainly worth considering when making projects since a more flattering shape generally makes the cosplay look better overall, even if it isn’t 100% ‘correct’ with the character. Generally speaking, wearing something that is comfy and you feel good in, makes you feel more confident, which makes the cosplay look better overall. Accuracy isn’t everything.

Starting with the top section of the dress, I made paper templates which I transferred onto the fabric and cut out leaving lots of seam allowance around the edge in case I wanted to adjust things later. It is better to have too much than too little when there is a bit of trial and error at play. I pinned the two layers together to quickly try the top on. Once I was happy with the shape, I then turned over the neck and arm edges twice to make sure the edge was nice and neat. This can be made smoother by cutting tiny slits into the fabric edge to allow the fabric to stretch where the curve is tighter without bunching. Before sewing this down I very carefully tried it on while the pins were in place, making any further adjustments needed. While sewing I made sure to leave one underarm open as this dress was going to have a side zip, a necessity for a fitted dress with no fabric stretch.
It was definitely easiest to complete the top, then pin on the waistband and try it on to make sure it was fitting properly, making any necessary adjustments, then continue onto adding the skirt. Each section was created in the same sort of way as the top, paper template, cut it out and pin it together then sew, leaving the side open to accommodate the zip. When it came to adding the skirt, I would always suggest making it longer than you think you need so it can be sewn into place and taken up to the correct length for where the dress actually sits on you. For me this took some adjusting to get the right, I took photos from various angles to make sure it was long enough before sewing the final edge, it is also worth moving about in the dress/outfit a bit as sometimes things settle into a different/higher place than when you first put it on.
[Draw Frilly Edge??]
Next, I moved on to adding the white frilly edge. This was simply a very long piece of organza; by holding the fabric up to the skirt edge I made sure I had 4 to 5 times the skirt width to give me space to create the gather. This long piece was folded in half on the short side and sewn into a tube down the open side. At this point I took the time to mark the centre, 1/4 and 3/4 points on the fabric next to the line I had just sewn, this can be done with pins or dressmakers chalk, it helps keep the frill even later.
Next, gathering the organza, I secured the thread at one end next to the previously sewn line and proceeded to loosely tack along the entire length of the fabric using a fairly long hand stitch, pushing the fabric further down the thread each time it was needed. Before tying off the thread I made sure its length matched the opening of the skirt, this also makes lining things up easier. With this complete, I sewed the organza into a closed loop.
[Draw frilly edge lining up??]
Now for lining up the loop with the skirt, this is where the marks we made come into play. The point where the loop is connected together goes at the back middle of the skirt and is pinned in place. Next, the middle point on the organza is pinned to the front middle of the skirt edge, don’t worry about how even the tacking thread is at this point. The same is then repeated with the 1/4 and 3/4 points being joined to the right and left the side of the skirt, this should be where the side seams are.
With these markers in place, the tacking thread should have evened itself up. If it hasn’t, just flatten out the dress and it should shuffle around. I will note at this point that it is a good idea to stop and hold the dress up, make sure the fabric is pinned in the right way, nothing is twisted or crossed over. If everything is looking good then you can proceed. Take each section one quarter at a time, even out the frilly edge and pin it into place, hold it up again to check its all looking good then sew down. You should not be able to see the sewn edge of the organza behind the skirt edge and the non-sewn edge of the tube should be hanging freely.
[Draw Bow making??]
Next, I moved on to the bow, which I kept fairly simple. It’s made of three pieces, the bow loops, the bow tails and the central loop holding things together, to get an idea for the size I used paper pieces held up against myself. Each piece is carefully sewn and aligned to hide any seams on the back. The bow loops are a long rectangular piece sewn into a loop and folded into a concertina and pinched in the middle. The bow tails are a long rectangle also folded into a concertina and also pinched in the middle. The last central piece is a small rectangle that holds the pinched sections of the rest of the bow together. It proved easier to sew the loop then slide the bow pieces into that loop than try to sew it in place. I left a tab on the back to allow me to safety pin the bow in place. The bow loops are also safety-pinned onto the dress to hold everything in the right place.
The Cardigan was a really simple change, it was just a case of pinning and sewing the edge into the new curved shape, the only thing I had to keep in mind is the fact that the fabric would fray and was stretchy. I used a lot of pins to keep the edge in place while I was sewing, it was quite a challenge not to stretch the fabric as I sewed which would have resulted in a ruffled edge.
For the shoes, i found a pair of suitable sandals, the only thing they were missing was the gemstone on the front. this was easy to fix, i managed to find some gemstones and used nail varnish to paint them the correct colour. they were easy to attach into place with some elastic jewellery thread.
[Hair Drawing]
The hair was quite tricky to figure out but once I had found a suitable idea it was easier to implement. Essentially, it is a thin board covered in fake hair. The first layer of hair was glued down completely to the board. The second layer was made up of short sections glued down at one end, each new piece covered the glue layer under it. This built up the fluffy hair effect without risking the hair moving around. These pieces were wedged into polystyrene balls that i had covered in fabric to create the hair band look she has in the reference images. I did have to cut them in half and cut out space for the hair to sit in. Lots of hot glue and some wire later i had managed to attach the hairpieces to a headband. I found that one with comb teeth gripped my hair/head best which meant it hopefully stay in place.
All of these pieces together create the Jasmine look, but she is not complete without Magnemite, check out a future post to see how i worked out the template.